Showing posts with label Mini Albums. Show all posts

3/23/2012

CTV Spring Blog Hop

Welcome to the CTV Spring Blog Hop  Create a card or craft project for Spring or Easter. Use any colors you'd like. The blog hop will  run from Saturday, March 24th at 12:01 AM EST to midnight EST on Sunday, March 25th with the blog candy winner announced on the following Monday, March 26th. Mary will be giving 2 sets of CTV stamps of the winners choice for blog candy.
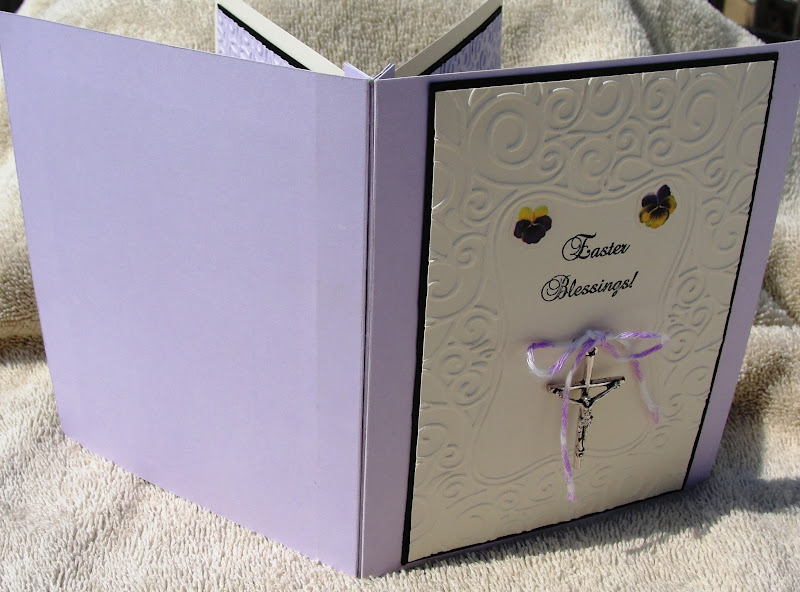
My project is a Easter Prayer Book titled "Easter Blessings". The design of this booklet is similar to my Christmas Tag Card and is very, very simple to make. Click here to see the basic instructions. The modifications I made were: the height of the prayer book is 5.5" and I only chose to add four pages so the width is 10.5" before folding. There are only two sets of mountain/valley folds for the pages. This booklet is A2 size when completed.
Here is the cover.
Here is the inside cover and page 1.
Here are pages 2 and 3* the center of the booklet.
Here is page 4 and the inside of the back cover.
Here are pics of the booklet opened showing the front and the back:
Here are the Bible scripture pages. These were made from the CTV Stamp set Easter Blessings (I also you this stamp set on the cover):

 Here are closeups of the Easter blessings:


Because I wanted the focus to be on the blessings ans scriptures, I kept the embellishments to a minimum only using two crosses (one is a silver charm and the other is a silver applique), some small floral stickers, and a small piece of twine I colored with a Sharpie to resemble baker's twine. The scriptures are stamped on tags I cut using Spellbinders dies.  They are matted on lilac card stock I ran through the Cuttlebug using a "Lace" folder.  The booklet cover's mat was also ran through another embossing folder. 
I hope you enjoyed looking at my projects.  If you have any questions or even just a little time, please leave me a comment.  I'd love to here from you.
Next is the very talented Karen; her project is just awesome so go take a look. If you need to go back, got lost, or just want to skip around here's the blog hop list in order:
Janis - http://www.pausedreamenjoy.blogspot.com/

3/17/2012

St. Patrick's Day Recipe Cards

If you are looking for the  CTV Challenge #7  please click here.

Hope everyone is having a great day of GREEN!!
I wanted to make some new pages for my Holidays Cookbook for St. Patrick's Day. Ichose one of our favorite recipes, Cheesy Potato Soup except I modified the title to "Pot O Gold Soup" just for the Irish!!!

The pages are each 6" squares. Here's a picture of the set:

And here they are as individual pages.

I used my Cricut and Paper Doll Dress Up to cut the sharmrocks (@1.25") and pot of gold (@5.25"); and "soup" and the oval's shadow were cut from From My Kitchen (@1.5").  I used my Gypsy to weld Pot o Gold using the font on A Child's Year.  

I hope you enjoyed my project. If you haven't thought of scrapbooking your recipes, I hope I inspired you to try one out. For more inspiration on recipe pages try one of these sites:

Cookbookin' http://www.livebinders.com/play/play_or_edit?id=55073 great source of sample pages

Happy Saint Pattie's Day!
Sue

11/14/2011

Christmas Tag Card

I watched this Paper Wishes Webisode on making a small mini from die cut labels.  I didn't really want to make a mini, but decided to make a card using the same idea.  I have a friend who loves the images of Christmas so much she displays them throughout her house all year long.  I thought she would get a kick out of this card.  It is so easy to make.  I still have to cover the front of the card, and now that my stamps have arrived I can get to that part.  But in the meantime I wanted to share the inside.  
You start with 6 1/8" by 12" piece of card, I used Recollections White Card.  You score along the 12" side at 4" and 8".  Between the 4 and 8 inch score lines you score every 1/2 inch.  
These 1/2" scores are folded mountain/valley then are glued to form four tabs.  These tabs become the spines for the pages.

You need 4 tags or shaped images (2 of each must be cut so you have a front and a back that match for each page).  I used labels from Preserves cartridge to make my pages.  You decorate the pages before you put them onto the spines.

I didn't add too many layers to the pages, so the card would be flat.  Most of the elements were stickers and rub ons I had in my stash from last Christmas sales.  I only inked all over the first page.  I thought I would like it, but it seemed a bit over powering when I got done.  Much of the bling is from Dazzles gems since they are flat but the holographic images are beautiful.

So here are the pages I made:
Page 1.


Pages 2 and 3


Pages 4 and 5


Pages 6 and 7


Page 8


Thanks for stopping by.  Leave a comment if you have the time.
Sue

11/03/2011

Christmas Organizer Binder

With Christmas just around the corner, I thought I would help out my cousin who is really overwhelmed right now by creating this Christmas Organizer.  It's my first organizer, but it won't be my last.  It is also the first time I used my Bind It All.  It won't last time I do that either.  This project was fun, fast and let me use up a lot of my older papers and embellishments.  Here's some pictures.
It measures 8 inches tall by 6 inches wide (not counting the binding rings).  The covers tie shut with a red ribbon.
 You can  put  additional pockets on the inside front and back covers, but I wanted to brighten up those surfaces with card stock stickers.
 Each page is made with one sheet of doublesided 12x12 paper.  You score the paper at 6 inches from top to bottom, and 4 inches from side to side.  Fold up the bottom toward the top to form the pocket; then fold the paper in half to the back.  The pocket crease is to the outside of the book and the open side of the pocket goes to the binding edge.  I didn't have any double sided Christmas paper, so I made my own by gluing two sheets together back to back.  I used one solid color sheet and one patterned sheet.  This made the pages a bit thicker, but very sturdy.   Each sheet of paper makes two pockets pages.
 This is based on a video I saw to make a card organizer here.  The original design was made as calendar pages for each month.  A calendar was placed on the 4 by 6 pocket front.  I chose to leave the pocket fronts blank so my cousin could decide how the pockets would be used.  The pockets will hold items that are 5 inches wide by 11 inches tall.  I may pick up some of the to do list tablets from Michaels dollar bins to go with this gift.  They would fit in the pockets and they come in many styles.
 I used more card stock stickers to decorate the pockets.


 I made both the front and back covers from paper covered 6 inch by 8 inch chipboard.  They are very sturdy.
This came out so nice, I think I'll make one or two organizers for me.
Thanks for stopping by.  Let me know what you think about it.
Sue

10/14/2011

Mini Album - Accordion Fold

Just a few peeks.  I'm working on a new mini album based on another of Laura's fabulous designs.  I actually have the book together and now I'm working on the decorations.  Here's a link to Laura's UStream on how to make the album.  She's a great teacher and fun to watch!! This is a huge album, but it didn't take long to create the basic album.  It just has so much room it take longer to make tags and mats and to decorate than to put the album together.  I'm entering this over at You Had Me At Craft, Pals Paper Arts and Really Reasonable Ribbon's Challenge.  You should check out all the fabulous projects people are working on this week.

I decided to make an album on Fall, Family and Fun.  This is a great album with just a ton of places to put pictures, memorabilia, and journaling.  All together there are 30-5x7 photo mats on the trio pockets, 10-5.5 by 11.5 photo mats on the full page pockets, 15 double sided 4.5 x 5.75 tags inside the trio pockets, 10 double sided 5x7.5 photo mats.  Plus the inside of the front and back covers have 5 by 11 areas for what ever you want to put into the book.  Whew! Here are some pics, I'll post more when I finish it.
The album is 11 inches high by 7 inches wide.
 Since my accordion folds weren't as pretty as Laura's, I cover the spine with an overlay of linen ribbon.  It is attached to the front and back covers, but not the folded card stock of the spine.
 All the items on the table under the album are decorations that still need to go into the album.
 I didn't make pockets on the front or back covers because I didn't think I needed more tags.  The punched area of the "Spine" is loose, but the rest of the "red" is glued to the cover.  I have my album divided into Apple Picking, Harvest/Pumpkin Patch, Autumn Festivals, Falling Leaves and Thanksgiving.  I didn't include Halloween because we have separate minis for that holiday.
 For each of the trio pockets, I cut tags using the Tags, Bags, Boxes and More Cartridge.


 For each of the full page pockets I made photo mats using the Preserves cartridge.
 This is the coolest cut!  Each cut gives you three frames.  By using double sided paper, you just get dozens of different combinations, and they look like you spent hours framing them just so. LOL


 The turkey is actually one of the place card holders I made from a kit year's ago!  I had a few left over and this seemed like a great place to use one.

Thanks for stopping by.
Sue